The teleprompter shown yesterday worked well enough so long as a level surface was nearby which could hold the device at eye level and the camera was small enough to mount close to the reflecting surface. In other words, the build was usable but not finished.
On the first day, the biggest problem was tapping the metal bar since the taps kept breaking. This time, workable steel was purchased. It was measured to reach the center of the platform and a little more, and extend beyond the back of the platform. This way the camera could be mounted further back and the bar could be mounted along most of the platform.

The bar was cut and drilled. Holes in the bar were sized according to what they needed to do. One hole needed to be tapped for a #10 machine screw, 10-32 in this case, some needed to be 1/4" (6.5mm) in diameter, and some needed to be tapped for 1/4-20 threads.

Two different sized taps were necessary, and two tap wrenches were available. The 10-32 hole and tap wrench can be seen in the background, and one of the 1/4-20 tapped holes and tap wrench is in the foreground.

After tapping, with no broken tools, the bar was mounted to the platform using the 1/4" (6.5mm) hole already drilled. This location had already been decided according to the previous building, so it was kept unaltered. Using a square, the bar was aligned with the edge, and the spot for a hole was marked. This hole lined up with the hole in the metal bar tapped for #10-32.

The platform was drilled at the marked location to 3/16" (4.75mm) diameter and countersunk on the top surface, where the computer would rest.
The bar was mounted to the platform using machine screws. The #10 machine screw threaded right into the metal bar, while the 1/4" bolt at the back went to a nut underneath the bar. This 1/4" bolt could be turned upside-down, and the camera head could be placed back there. Perhaps a second camera head will be mounted.

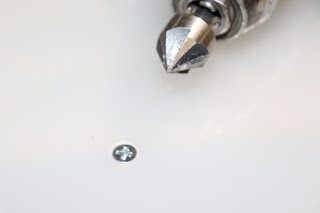
A perfect length for the #10 machine screw couldn't be found so a readily-available screw was cut down so that it could rest flush with the underside of the metal bar. In the picture below, the large threaded hole is 1/4-20 and intended for a tripod while the dot near the red end of the bar is the screw.

Before, the camera was lower than desired so an adapter was made which elevated the camera. The adapter was a 1/4-20 coupler nut, a segment of threaded rod, fastened together with a jamb nut. All these parts went between the black camera head with the ball and the padded plastic nut.

A phone adapter was used to attach a cell phone to the camera head. It was higher than before and stable. The reflector had not been reattached at this point.

A DSLR camera was connected to the rig, and it was less stable than the phone but enough for recording from a tripod. The elevation of the camera was still a good height and any lower might be too low.

The reflector and black material were reattached. A small tripod was on-hand and used for the first test. Stability was a problem with this inexpensive tripod which was mostly cheap plastic. It would not sit level, but it functioned enough to test with a cell phone which was reflected clearly.

After all the testing, the material was wrapped around the reflector, and everything was folded flat and ready to go home.

First time here?
Completed projects from year 1
Completed projects from year 2
Completed projects from year 3
Completed projects from year 4
Completed projects from year 5
Disclaimer for http://24hourengineer.blogspot.com and 24HourEngineer.com
This disclaimer must be intact and whole. This disclaimer must be included if a project is distributed.
All information on this blog, or linked by this blog, is not to be taken as advice or solicitation. Anyone attempting to replicate, in whole or in part, is responsible for the outcome and procedure. Any loss of functionality, money, property or similar, is the responsibility of those involved in the replication.
All digital communication regarding the email address 24hourengineer@gmail.com becomes the intellectual property of Brian McEvoy. Any information contained within these messages may be distributed or retained at the discretion of Brian McEvoy. Any email sent to this address, or any email account owned by Brian McEvoy, cannot be used to claim property or assets.
Comments to the blog may be utilized or erased at the discretion of the owner. No one posting may claim property or assets based on their post.
This blog, including pictures and text, is copyright to Brian McEvoy.
2018-02-03
On the first day, the biggest problem was tapping the metal bar since the taps kept breaking. This time, workable steel was purchased. It was measured to reach the center of the platform and a little more, and extend beyond the back of the platform. This way the camera could be mounted further back and the bar could be mounted along most of the platform.

Measuring bar
The bar was cut and drilled. Holes in the bar were sized according to what they needed to do. One hole needed to be tapped for a #10 machine screw, 10-32 in this case, some needed to be 1/4" (6.5mm) in diameter, and some needed to be tapped for 1/4-20 threads.

Drilled hot-rolled steel
Two different sized taps were necessary, and two tap wrenches were available. The 10-32 hole and tap wrench can be seen in the background, and one of the 1/4-20 tapped holes and tap wrench is in the foreground.

Tapping holes
After tapping, with no broken tools, the bar was mounted to the platform using the 1/4" (6.5mm) hole already drilled. This location had already been decided according to the previous building, so it was kept unaltered. Using a square, the bar was aligned with the edge, and the spot for a hole was marked. This hole lined up with the hole in the metal bar tapped for #10-32.

Marking hole location
The platform was drilled at the marked location to 3/16" (4.75mm) diameter and countersunk on the top surface, where the computer would rest.

Countersunk screw
The bar was mounted to the platform using machine screws. The #10 machine screw threaded right into the metal bar, while the 1/4" bolt at the back went to a nut underneath the bar. This 1/4" bolt could be turned upside-down, and the camera head could be placed back there. Perhaps a second camera head will be mounted.

Metal bar mounted
A perfect length for the #10 machine screw couldn't be found so a readily-available screw was cut down so that it could rest flush with the underside of the metal bar. In the picture below, the large threaded hole is 1/4-20 and intended for a tripod while the dot near the red end of the bar is the screw.

Flush machine screw
Before, the camera was lower than desired so an adapter was made which elevated the camera. The adapter was a 1/4-20 coupler nut, a segment of threaded rod, fastened together with a jamb nut. All these parts went between the black camera head with the ball and the padded plastic nut.

Modified 1/4" stub and camera head parts
A phone adapter was used to attach a cell phone to the camera head. It was higher than before and stable. The reflector had not been reattached at this point.

Phone mounted
A DSLR camera was connected to the rig, and it was less stable than the phone but enough for recording from a tripod. The elevation of the camera was still a good height and any lower might be too low.

DSLR camera mounted
The reflector and black material were reattached. A small tripod was on-hand and used for the first test. Stability was a problem with this inexpensive tripod which was mostly cheap plastic. It would not sit level, but it functioned enough to test with a cell phone which was reflected clearly.
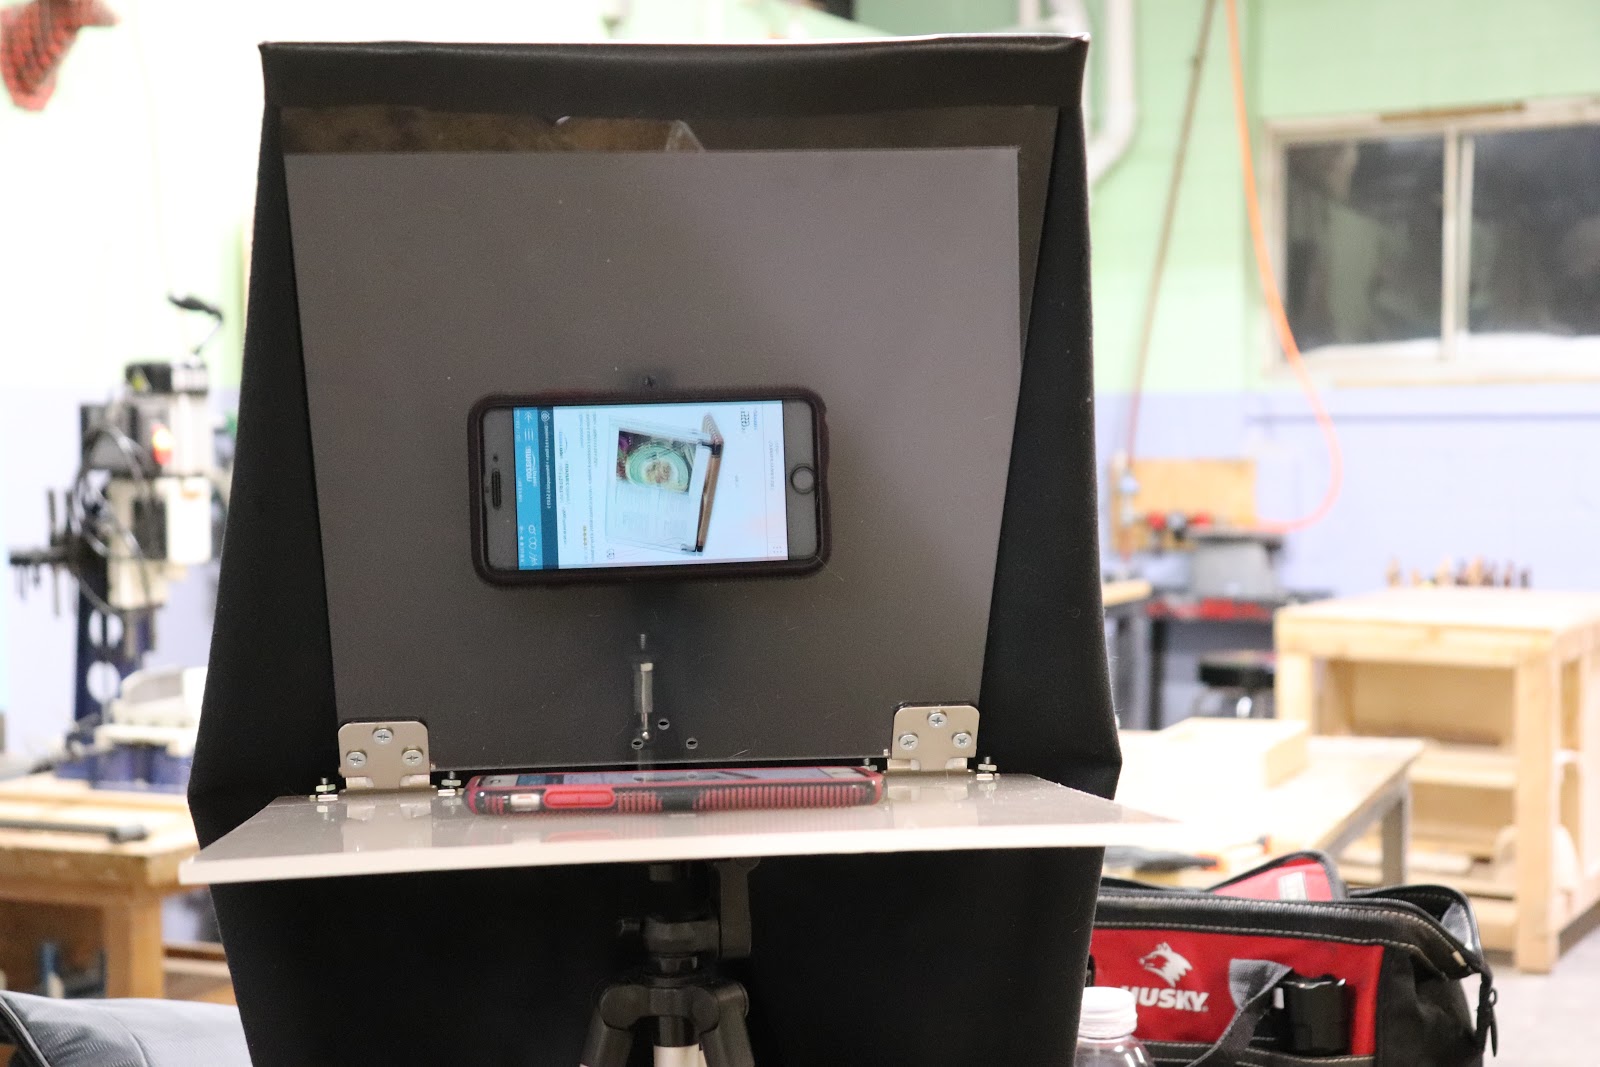
Showing a reflection from a tripod
After all the testing, the material was wrapped around the reflector, and everything was folded flat and ready to go home.

Folded up and completed, again
First time here?
Completed projects from year 1
Completed projects from year 2
Completed projects from year 3
Completed projects from year 4
Completed projects from year 5
Disclaimer for http://24hourengineer.blogspot.com and 24HourEngineer.com
This disclaimer must be intact and whole. This disclaimer must be included if a project is distributed.
All information on this blog, or linked by this blog, is not to be taken as advice or solicitation. Anyone attempting to replicate, in whole or in part, is responsible for the outcome and procedure. Any loss of functionality, money, property or similar, is the responsibility of those involved in the replication.
All digital communication regarding the email address 24hourengineer@gmail.com becomes the intellectual property of Brian McEvoy. Any information contained within these messages may be distributed or retained at the discretion of Brian McEvoy. Any email sent to this address, or any email account owned by Brian McEvoy, cannot be used to claim property or assets.
Comments to the blog may be utilized or erased at the discretion of the owner. No one posting may claim property or assets based on their post.
This blog, including pictures and text, is copyright to Brian McEvoy.
2018-02-03
Comments
Post a Comment