I had my pieces drafted and ready to cut, but I needed non-ferrous posts to poke from the top and bottom to suspend a cylindrical magnet. I planned to use brass nails, but I forgot to buy some. I had 18 AWG copper wire which is 1.0237 millimeters in diameter. I changed the draft to reflect the new hole size and started cutting. While the laser ran, I straightened the wire with a drill and cut six two-inch (50mm) segments. I planned to put the pieces in my drill and spin them against a metal file to form points.
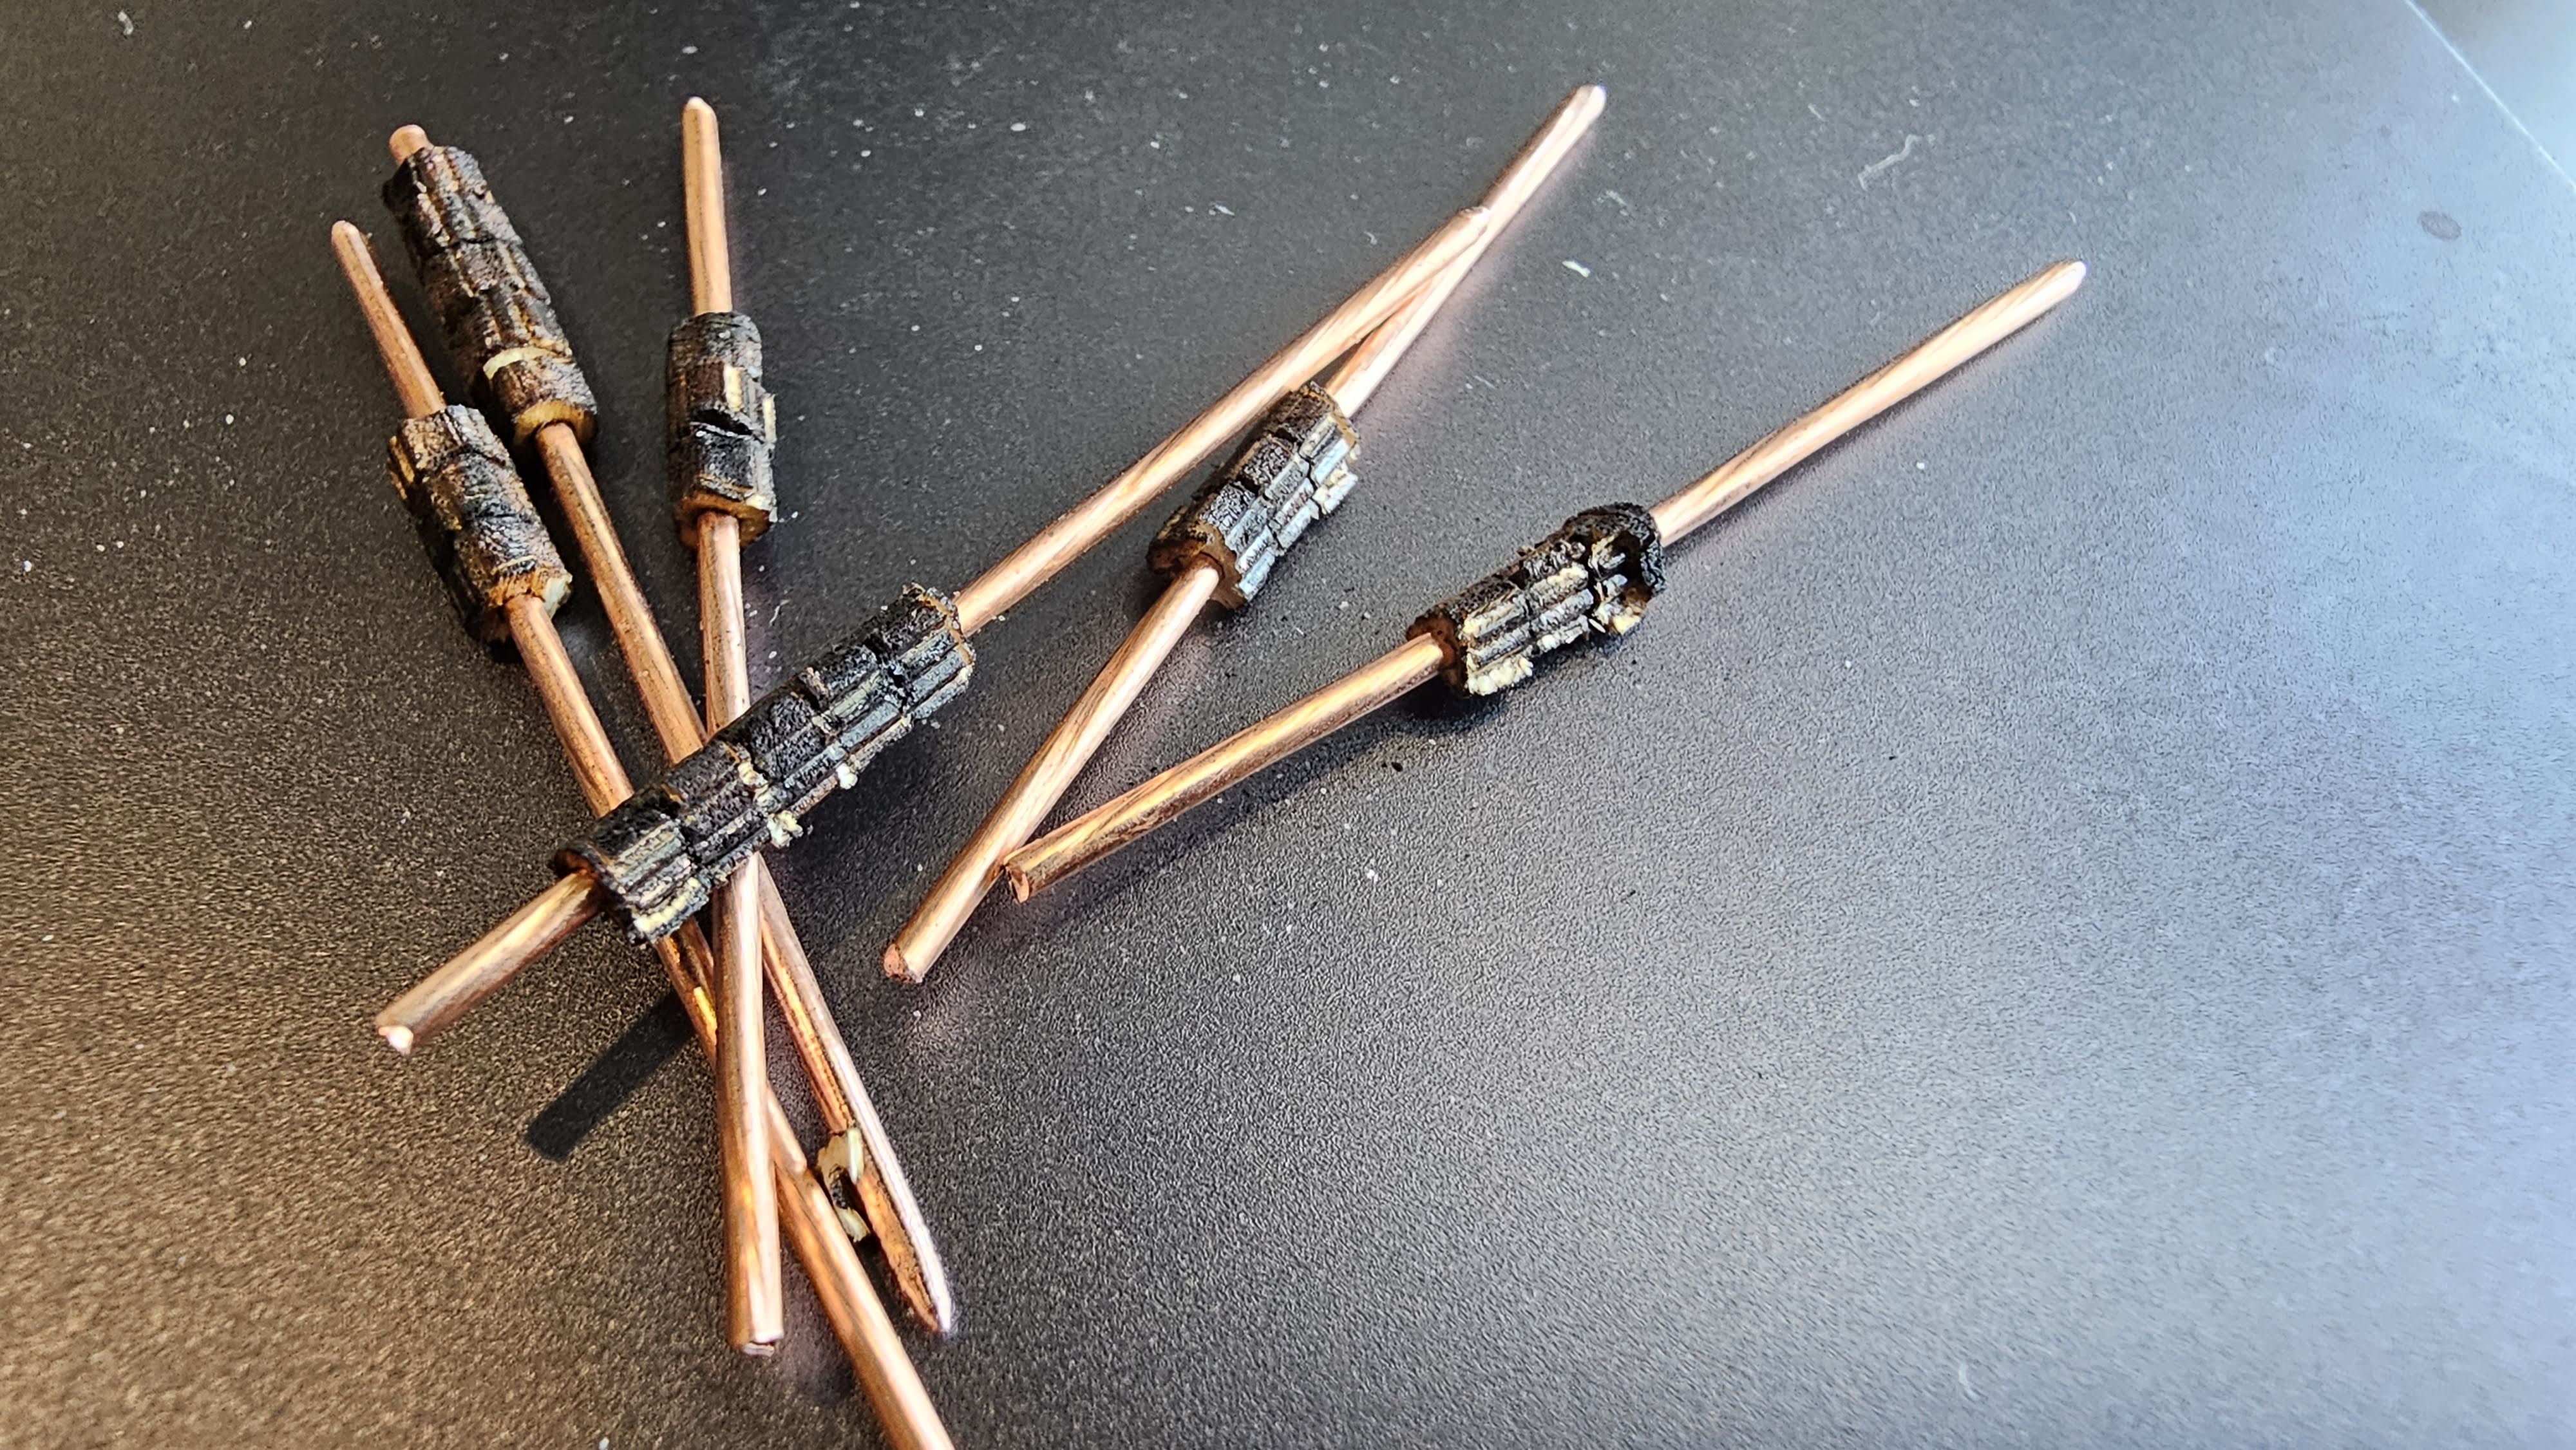
My drill chuck would not pinch the small wire when it was unkinked. I drafted some shapes that would fit the wire through a small circular hole in the center and conform to the drill on the outside with three lobes. They would be tiny parts destroyed by the process, but they only had to work once. The sharpening went well, but it took a lot of time.


The next phase was to cut some posts from the sharpened wire and insert them into my wooden model. I had to deburr the flat end after cutting, and I tried to use a drum sander in a small rotary tool, but the piece was too small to handle. I had the bright idea of holding them with the drill, and I found that I could sharpen a copper wire to a finer point in seconds with the tools combined. I resharpened both sides of all the posts, after which the wooded adapters I made absolutely crumbled!
 Double spin sharpening method
Assembling the model went very well. I revised a few parts and recut, but it went swiftly. In the bottom, I had a slot to hold a plastic strip that the bottom post rested on. The plastic was from a zip tie, so it was flexible and gave the copper rod some give. I could deflect the piece approximately one millimeter, which should be sufficient to keep the magnet suspended without jittering.
I revised my earlier "adjustable window" design for a simple opening where the plastic was contained in a narrow, slow, but it could bow out. Number "3" has the flimsy starter end of a zip tie, and number "4" has the stiffer part from the middle of a zip tie. The height difference was a due to a change in the circular bottom. Number "3" needed six screws and sat high, but number four only needed four and was more stable.
 Rev1.003 and Rev1.004
GitHub files for GrinderCompass
The rest of the posts for this project have been arranged by date.
First time here?
Completed projects from year 1
Completed projects from year 2
Completed projects from year 3
Completed projects from year 4
Completed projects from year 5
Completed projects from year 6
Completed projects from year 7
Completed projects from year 8
Disclaimer for http://24hourengineer.blogspot.com and 24HourEngineer.com
This disclaimer must be intact and whole. This disclaimer must be included if a project is distributed.
All information on this blog, or linked by this blog, is not to be taken as advice or solicitation. Anyone attempting to replicate, in whole or in part, is responsible for the outcome and procedure. Any loss of functionality, money, property, or similar, is the responsibility of those involved in the replication.
All digital communication regarding the email address 24hourengineer@gmail.com becomes the intellectual property of Brian McEvoy. Any information contained within these messages may be distributed or retained at the discretion of Brian McEvoy. Any email sent to this address, or any email account owned by Brian McEvoy, cannot be used to claim property or assets.
Comments to the blog may be utilized or erased at the discretion of the owner. No one posting may claim property or assets based on their post.
This blog, including pictures and text, is copyright to Brian McEvoy.
2023-07-06
My drill chuck would not pinch the small wire when it was unkinked. I drafted some shapes that would fit the wire through a small circular hole in the center and conform to the drill on the outside with three lobes. They would be tiny parts destroyed by the process, but they only had to work once. The sharpening went well, but it took a lot of time.

Chuck adapter bushings
The next phase was to cut some posts from the sharpened wire and insert them into my wooden model. I had to deburr the flat end after cutting, and I tried to use a drum sander in a small rotary tool, but the piece was too small to handle. I had the bright idea of holding them with the drill, and I found that I could sharpen a copper wire to a finer point in seconds with the tools combined. I resharpened both sides of all the posts, after which the wooded adapters I made absolutely crumbled!

Assembling the model went very well. I revised a few parts and recut, but it went swiftly. In the bottom, I had a slot to hold a plastic strip that the bottom post rested on. The plastic was from a zip tie, so it was flexible and gave the copper rod some give. I could deflect the piece approximately one millimeter, which should be sufficient to keep the magnet suspended without jittering.
I revised my earlier "adjustable window" design for a simple opening where the plastic was contained in a narrow, slow, but it could bow out. Number "3" has the flimsy starter end of a zip tie, and number "4" has the stiffer part from the middle of a zip tie. The height difference was a due to a change in the circular bottom. Number "3" needed six screws and sat high, but number four only needed four and was more stable.

GitHub files for GrinderCompass
The rest of the posts for this project have been arranged by date.
First time here?
Completed projects from year 1
Completed projects from year 2
Completed projects from year 3
Completed projects from year 4
Completed projects from year 5
Completed projects from year 6
Completed projects from year 7
Completed projects from year 8
Disclaimer for http://24hourengineer.blogspot.com and 24HourEngineer.com
This disclaimer must be intact and whole. This disclaimer must be included if a project is distributed.
All information on this blog, or linked by this blog, is not to be taken as advice or solicitation. Anyone attempting to replicate, in whole or in part, is responsible for the outcome and procedure. Any loss of functionality, money, property, or similar, is the responsibility of those involved in the replication.
All digital communication regarding the email address 24hourengineer@gmail.com becomes the intellectual property of Brian McEvoy. Any information contained within these messages may be distributed or retained at the discretion of Brian McEvoy. Any email sent to this address, or any email account owned by Brian McEvoy, cannot be used to claim property or assets.
Comments to the blog may be utilized or erased at the discretion of the owner. No one posting may claim property or assets based on their post.
This blog, including pictures and text, is copyright to Brian McEvoy.
2023-07-06
Comments
Post a Comment